Import climate files
Download climate file
- Gebouwsimulatie
The climate files import wizard, with its step-by-step entry method, allows you to easily import climate files. It is possible to read climate files from the KNMI. A climate file that can be imported into Vabi Elements must contain all the climate data. The table below shows the weather stations in the Netherlands whose climate files are suitable for import into Vabi Elements. Additionally, it is possible to import so-called EPW files. EPW climate files come in two versions: one for energy calculations and one for comfort calculations. Therefore, be mindful of the type of calculation you wish to perform and the corresponding type of climate file needed.
Download the hourly data within the Netherlands
Click here to download the hourly data for your chosen location from the KNMI website. You can also select the desired period.
Available KNMI weather stations are:
- 209 IJmond
- 210 Valkenburg
- 215 Voorschoten
- 225 IJmuiden
- 229 Texelhors
- 235 De Kooy
- 240 Schiphol
- 242 Vlieland
- 248 Wijdenes
- 249 Berkhout
- 251 Hoorn Terschelling
- 257 Wijk aan Zee
- 258 Houtribdijk
- 260 De Bilt
- 265 Soesterberg
- 267 Stavoren
- 269 Lelystad
- 270 Leeuwarden
- 273 Marknesse
- 275 Deelen
- 277 Lauwersoog
- 278 Heino
- 279 Hoogeveen
- 280 Eelde
- 283 Hupsel
- 285 Huibertgat
- 286 Nieuw Beerta
- 290 Twenthe
- 308 Cadzand
- 310 Vlissingen
- 311 Hoofdplaat
- 312 Oosterschelde
- 313 Vlakte v.d. Raan
- 315 Hansweert
- 316 Schaar
- 319 Westdorpe
- 323 Wilhelminadorp
- 324 Stavenisse
- 330 Hoek van Holland
- 331 Tholen
- 340 Woensdrecht
- 343 R’dam-Geulhaven
- 344 Rotterdam
- 348 Cabauw
- 350 Gilze-Rijen
- 356 Herwijnen
- 370 Eindhoven
- 375 Volkel
- 377 Ell
- 380 Maastricht
- 391 Arcen
Download hourly data of climate files worldwide
You can download hourly data from locations around the world from EnergyPlus (free) or Meteonorm (paid).
Select file
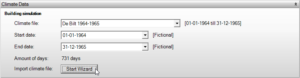
You can find the climate import wizard under Project Data – Environment. After invoking the wizard, the above window named Climate Files Import Wizard will appear. In step 1, you specify which climate file you want to import. Once a valid file is selected, you can click Next.
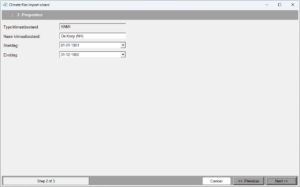
Properties
In this step, you can specify the name of your climate file. This name will also be used in the list of climate files you can choose from in Elements.
Also, specify the start day and end day.
Result
When you click Finish, the climate file is added. You can find it back in the list of available climate files in Elements.
