Ventilation Flow
Warning: first check ‘ventilation flows’ in project data> project settings.
Ventilation Flow Building simulation
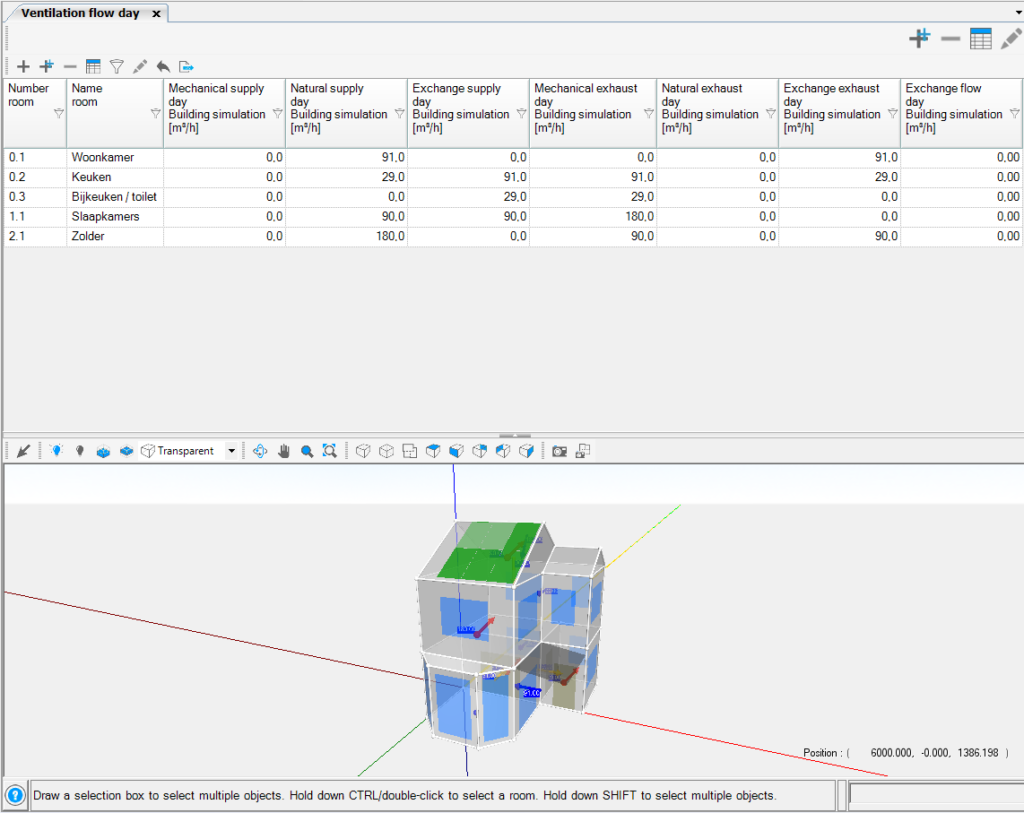
Under the Ventilation Flows Building Simulation menu, you will find the results from the Ventilation Flows Building Simulation module. The Ventilation Flows Building Simulation module provides one type of result: tables. These results can only be generated when the Building Simulation module is also enabled.
There are three tables available for the Ventilation Flows Building Simulation module. These are as follows:
- Daytime Ventilation Rates: This table provides an overview of ventilation rates per room when the system is operating during the day;
- Nighttime Ventilation Rates: This table provides an overview of ventilation rates per room when the system is operating during the night;
- Conditional Nighttime Ventilation Rates: This table provides an overview of ventilation rates per room when the system is operating in a conditional nighttime mode.
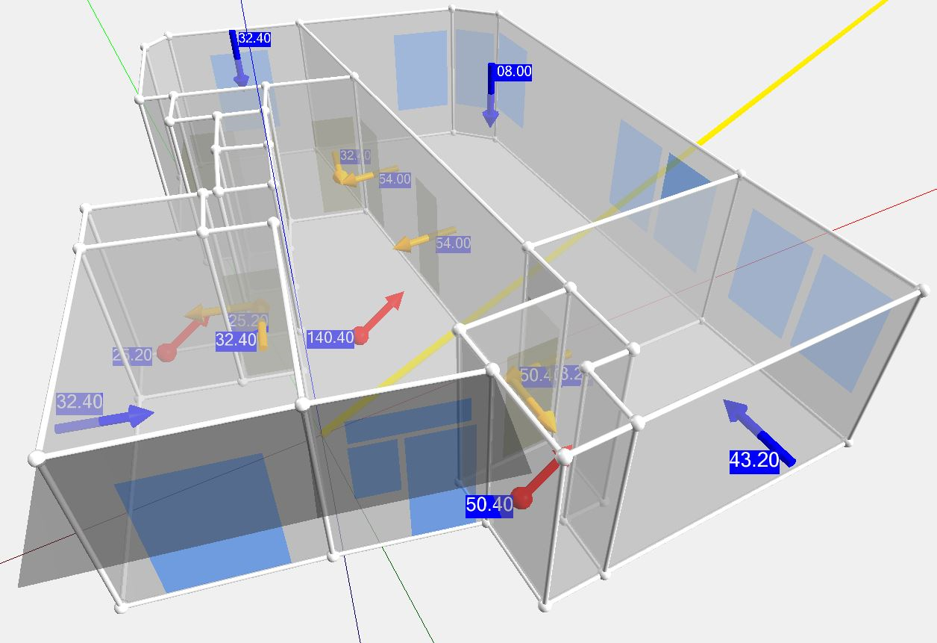
The general functionalities of the tables can be found on the Tables webpage. The 3D function is not present in these tables, as the 3D visualization is directly displayed on the screen. This allows for the generation of floor plans with ventilation flows depicted on them.
Ventilation Flow Heat loss
Under the Ventilation Flows Heat loss menu, you will find the results from the Ventilation Flows Heat loss module. The Ventilation Flows Heat loss module provides one type of result: tables. These results can only be generated when the Heat loss module is also enabled in room properties.
Tips to visualize ventilation flow
When simulating a building, you need to fill in the ventilation quantities. Subsequently, visualize the ventilation flows using a 3D visualization to quickly and easily verify your input.
Tip 1. Make use of an orderly table
The input of yo9ur ventilation flow rate become visible in your table. You can choose for a table with day-, night-, and/ or conditional nighttime. With the table you will get a good overview of the ventilation quantities per room.
Tip 2. Check the ventilation flow in 3D
Click the table with the ventilation quantities and receive a 3D visualization of the ventilation flow. This way you can quickly control the ventilation flows and you can easily see which room and when (day, night, and or conditional night) you need to adjust.
Tip 3. Make multiple ventilation flows easily insightful.
Under properties> Rooms> Pencil> Ventilation> Air exchange you can fill in a negative value for exhaust and a positive value for supply. This way you can quickly calculate multiple overflows for multiple rooms.


