Solar panels
Add solar panels
- Gebouwsimulatie
![]()
Solar panels can be added by clicking on the “Place PV Panel” function in the menu bar. You can then place them on a surface or on the flat surface around a building.
Click here to view the Featured Functionalities article on PV panels in building simulation.
Steps to Add a Solar Panel
- Gebouwsimulatie
- Click on the “Place PV Panel” function in the menu bar within the substructures window.

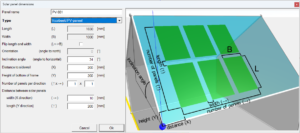
- Click on a surface or the ground in the geometry. The following window will appear.

From the surface and point selected in step 2, the solar panels can be placed. The following input fields are important:
- Type: This is the type of panel previously entered under tools – solar panels.
- Length and Width: These are taken from the tools.
- Flip Length and Width: This can be selected if you want to place the panels in landscape rather than portrait orientation.
- Orientation: The orientation of the panels relative to north in degrees.
- Inclination Angle: The angle of the panels relative to the horizontal.
- Distance to Sidewall (X): The distance from the sidewall of the panel to the selected point.
- Height of Bottom of frame (Y): The distance from the bottom of the panel to the selected point.
- Number of Panels per Direction: Specifies how many panels are placed per direction, allowing entire arrays to be placed at once.
- Distance Between solar Panels: The distance between the panels in the X and Y directions.
When “OK” is clicked, the panels are placed. Right-clicking on the panels allows for adjustments.
With ctrl + left mouse click, an entire array of panels can be selected. The panels can be moved using the move function and rotated using the rotate function.